The Art and Craft of Leather Dyeing: A Comprehensive Guide!
- Home
- Editor's Desk
- The Art and Craft of Leather Dyeing: A Comprehensive Guide!
- 3rd Anniversary Gifts
- ALL PRODUCTS
- Aprons
- BACKPACKS
- Best Sellers
- Bridesmaid Gifts
- BUSINESS PORTFOLIOS
- Chef Collectibles
- Desk Mats
- Father's Day Gifts
- For the Writers
- For Your Business
- for-the- travels
- Gifts $100-$200
- Gifts $50-$100
- Gifts Under $50
- Graduation Gifts
- Groomsmen Gifts
- KNIFE ROLLS
- LEATHER JOURNALS
- Men Collection
- MEN WALLETS
- MESSENGER BAGS
- MISCELLANEOUS
- Mother's Day Gifts
- New arrivals
- PENCIL CASES
- Rustic Town X Women
- SATCHEL
- TOILETRY BAGS
- Totes
- TRAVEL BAGS
- Travel Essentials
- Watch Case
- WOMEN BAGS
- Women Collection
- Women Wallets
- ##bound
- #2024
- #aestheticjournal
- #AffordableLeatherGoods
- #AirlineGuidelines
- #americanbisonvsbuffalo
- #americanbuffalovsbison
- #AmericanWildlife
- #antiquejournal
- #apron
- #ApronComfort
- #ApronCraftsmanship
- #ApronFashion
- #ApronInspiration
- #ApronProtection
- #aprons
- #ApronStyle
- #ArtisanApron
- #ArtisanLeather
- #ArtOfWriting

Leather is timeless, but even the most beautifully crafted leather items can lose their luster over time. Fortunately, dyeing leather can breathe new life into your favorite pieces, offering a way to refresh their appearance and inject a touch of personal style. In this guide, we'll delve into the art of leather dyeing, covering everything from the basics to advanced techniques.
What is Leather Dyeing?
Leather dyeing is the art of transforming the surface color of leather goods. This intricate process alters the appearance, feel, and sometimes even the texture of the leather, breathing new life into everything from jackets and bags to shoes and furniture. It's a craft that combines the science of chemistry with the artistry of color theory, allowing for a wide range of aesthetic and functional improvements.
Why Dye Leather?
Leather items, though durable, are not immune to the ravages of time. With age, they may lose their luster, fading under the relentless assault of sunlight and wear. Dyeing offers a second chance, a rejuvenation of their appearance that restores their former glory. Beyond mere restoration, dyeing leather opens a world of customization. It breaks the chains of standardization, offering a palette of colors that can express individuality, creativity, and style. Whether you're aiming to revive an old leather favorite or craft a unique piece, dyeing is your gateway to infinite possibilities.
Dyeing not only refreshes the color but can also hide blemishes, making your leather goods look as good as new. It's an opportunity to erase the wear of years, reviving the beauty of leather with vibrant hues or rich, deep tones.
Why settle for the ordinary? Leather dyeing invites you to envision your leather goods as a blank canvas, ready to be transformed by your imagination. From bold, eye-catching colors to subtle, sophisticated tones, the choice is yours.
What Are the Different Types of Leather Dyes?
When it comes to leather dyes, various options cater to different needs and preferences. Understanding the characteristics of each type can help you achieve the desired results.
Basic Dyes for Dark Shades
Basic dyes offer deep, rich colors ideal for achieving dark shades such as black, brown, or navy. These dyes penetrate the leather deeply, resulting in long-lasting color saturation and excellent coverage.
Acid Dyes for Fancy Shades
Acid dyes are prized for their ability to produce vibrant, fancy shades such as reds, blues, and purples. These dyes work best on lighter-colored leathers and provide excellent color clarity and intensity.
Sulfur Dyes for Deep Penetration
Sulfur dyes penetrate the leather deeply, resulting in intense, long-lasting colors. Ideal for achieving rich, uniform hues, sulfur dyes offer superior color fastness and durability.
Sunlight for Natural Tanning
For those seeking a more natural approach, sunlight can be used to tan leather, gradually darkening its hue over time. This method yields subtle, organic results and is perfect for those who prefer a rustic, weathered look.
Which Type of Leather Can Be Dyed?
Most types of leather can be dyed, including cowhide, sheepskin, and goatskin. However, it's essential to note that the success of the dyeing process depends on factors such as the leather's finish and condition. While unfinished leathers absorb dye more readily, finished leathers may require additional preparation to achieve satisfactory results.
Tools and Materials Needed
Before embarking on your leather dyeing journey, gather the necessary tools and materials to ensure a smooth and successful process.
List of Essential Tools for Leather Dyeing
-
Dyes and Pigments
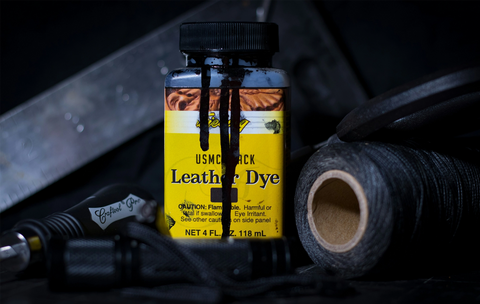
Choose high-quality leather dyes and pigments in the desired colors. Opt for products specifically formulated for leather to ensure optimal results.
-
Brushes and Daubers
Select brushes and daubers of various sizes to facilitate precise application of the dye. Brushes with soft, natural bristles are ideal for smooth, even coverage.
-
Cleaning Supplies
Prepare the leather surface by cleaning it thoroughly with leather cleaner and a soft cloth. Remove any dirt, grease, or previous coatings to ensure proper dye adhesion.
Safety Measures for Leather Dyeing
While leather dyeing can be a rewarding experience, it's essential to prioritize safety to prevent accidents and minimize health risks.
Importance of Safety in Leather Dyeing
-
Potential Hazards
Leather dyes and chemicals can pose health hazards if mishandled or improperly used. These may include skin irritation, respiratory issues, and eye damage.
-
Long-term Implications
Repeated exposure to leather dyes and solvents can have long-term health implications, including dermatological conditions and respiratory problems. It's crucial to take adequate precautions to minimize the risk of adverse effects.
Safety Gear and Precautions to Take
-
Necessary Safety Equipment
Wear protective gear, including gloves, safety goggles, and a respirator, to shield yourself from harmful chemicals and fumes. Additionally, ensure adequate ventilation in your workspace to dissipate fumes and prevent inhalation.
-
Safe Workspace Setup
Designate a well-ventilated area for leather dyeing and lay down protective coverings to prevent spills and stains. Keep all chemicals and equipment out of reach of children and pets to avoid accidents.
How to Dye Leather in 5 Easy Steps
Now that you've gathered your tools and taken the necessary safety precautions, it's time to dive into the leather dyeing process.
Step 1: Prep the Leather
Before diving into the dyeing process, it’s crucial to prepare your leather properly. Here’s how:

- Put on Gloves
Protect your hands from the dye and chemicals by wearing gloves throughout the process. This ensures your skin remains safe and prevents any unwanted staining.
- Ventilate the Room
Ensure proper ventilation in the area where you’ll be dyeing the leather. Many dyes contain strong chemicals that can emit fumes, so working in a well-ventilated space is essential for your health and safety.
- Select the Correct Leather
Not all leather is created equal, and different types of leather may require different dyeing techniques or products. Ensure you’re using a dye that’s suitable for the type of leather you’re working with to achieve the best results.
- Wipe Down the Leather
Clean the leather surface thoroughly to remove any dirt, dust, or oils that may prevent the dye from adhering properly. Use a mild leather cleaner or a damp cloth to wipe down the leather and allow it to dry completely before proceeding.
- Cut Your Dyes
Prepare your dyes according to the manufacturer’s instructions. This may involve diluting the dye with water or mixing different colors to achieve your desired shade. Have all your dyes ready and within reach before starting the application process.
Step 2: Apply a Base Coat in Circles
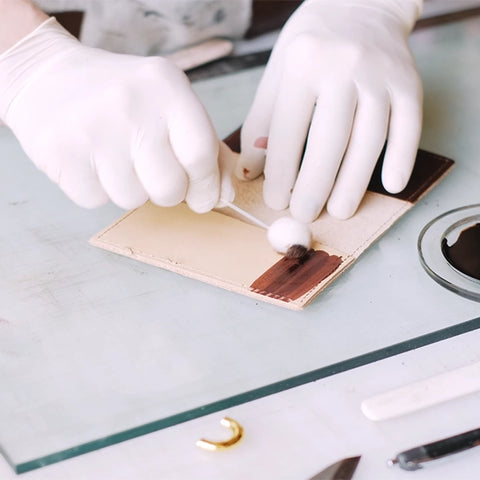
Once your leather is prepped, it’s time to start applying the dye. Begin by applying a base coat of dye using a circular motion. This helps ensure even coverage and allows the dye to penetrate the leather fibers effectively. Use a sponge or brush to apply the dye, working in small sections at a time.
Step 3: Apply a Second Coat Diagonally to the Right
After applying the base coat, allow it to dry completely before moving on to the next step. Once dry, apply a second coat of dye using a diagonal motion, working from top right to bottom left. This layer helps deepen the color and provides additional coverage, especially for lighter or more porous leathers.
Step 4: Apply a Second Coat Diagonally to the Left
Repeat the process from step 3, but this time apply the dye diagonally from top left to bottom right. This ensures thorough coverage and helps achieve a rich, consistent color across the entire surface of the leather.
Step 5: Apply a Finish and Buff
Once the dye has dried completely, apply a finisher or sealer to protect the color and enhance the leather’s durability. Choose a finisher that’s compatible with the dye you’ve used and follow the manufacturer’s instructions for application. Once the finisher has dried, buff the leather with a soft cloth to bring out its natural shine and smooth any rough spots.
What Are the Main Types of Finishes for Leather?
After dyeing, applying a finish can enhance the appearance and durability of the leather. Here are some popular finish options to consider:\

- Gloss Finish
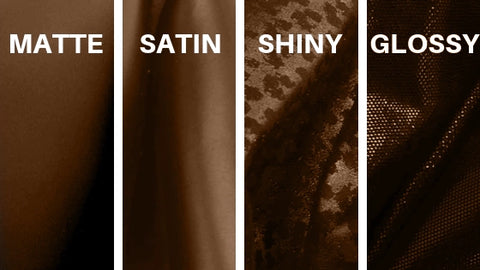
A gloss finish adds shine and luster to the leather, creating a polished, refined appearance. This finish is ideal for formal or dressy leather items.
- Matte Finish
A matte finish offers a subtle, understated look, with minimal shine or reflection. This finish is perfect for achieving a natural, rustic aesthetic.
- Satin Finish
A satin finish strikes a balance between gloss and matte, offering a soft, luxurious sheen. This versatile finish works well for a wide range of leather items.
- Metallic Finish
A metallic finish adds a touch of glamour and sophistication to leather, with shimmering metallic hues such as gold, silver, or bronze.
- Textured Finish
A textured finish adds visual interest and tactile appeal to leather, with embossed patterns or textures that enhance its overall look and feel.
Types of Application of Leather Dyeing
When it comes to applying leather dye, various techniques and tools can be used to achieve different effects.

- Hand-wipes or Sponging:
Hand-wiping or sponging involves applying dye to the leather surface using a soft cloth or sponge. This method allows for greater control and precision, making it ideal for intricate designs or detailed work.
- Brush Finishes
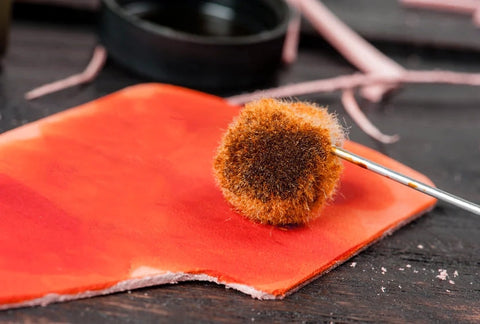
Brushing involves using a brush to apply dye to the leather surface, allowing for smooth, even coverage. Brushes with soft, natural bristles are recommended for best results.

- Sprayers
Spraying involves using a spray gun or airbrush to apply dye to the leather surface in fine, even layers. This method is suitable for large or uneven surfaces and provides quick, uniform coverage.
- Vinegaroon
Vinegaroon is a natural dye made from vinegar and iron filings, which reacts with the tannins in the leather to produce a rich, dark color. This traditional method is perfect for achieving antique or distressed effects.
How Hard Is It to Dye Leather?
Dyeing leather requires patience, attention to detail, and a willingness to experiment. While the process itself is relatively straightforward, achieving professional-quality results may take practice and skill. However, with the right tools, techniques, and guidance, anyone can learn to dye leather effectively.
How Do You Dye Leather Properly?
To dye leather properly, it's essential to follow the recommended steps and techniques carefully. Start by prepping the leather surface, selecting the appropriate dye and finish, and applying them evenly using the chosen method. Take your time and work methodically to ensure thorough coverage and a seamless finish.
Maintenance and Redyeing
Once you've dyed your leather items, proper maintenance is key to preserving their appearance and prolonging their lifespan. Regularly clean and condition the leather to prevent drying, cracking, or fading. Additionally, be prepared to redye the leather over time as needed, especially in high-wear areas or if the color begins to fade. With proper care and attention, your dyed leather items can remain beautiful and vibrant for years to come.
In conclusion, dyeing leather is a rewarding craft that allows for endless creativity and personal expression. By following the steps outlined in this guide and taking the necessary precautions, you can transform ordinary leather items into works of art that reflect your unique style and personality. So, roll up your sleeves, unleash your creativity, and embark on your leather dyeing journey today!
Shop Our Leather Collection of:
Travel Bag | Messenger Bag | Women Bags | Journals | Portfolios | Toiletry Bags | Satchels | Pencil Cases | Knife Roll


